LightScope
Installation Guide
LightScope is available for multiple operating systems
This project is my passion, so if you want to chat about your results, have questions, suggestions, or want to collaborate, please reach out to me! (I promise I'm friendly). Email me at e@alumni.usc.edu
Choose Your Operating System
Docker Installation (Recommended)
The easiest way to run LightScope is using Docker. This works on any system with Docker installed.
Quick Start
Copy and paste the following command to pull and run LightScope:
docker pull synback/lightscope:latest && docker run -d --name lightscope --cap-add=NET_RAW --cap-add=NET_ADMIN --network=host --restart=unless-stopped synback/lightscope:latest✅ That's it! LightScope is now running and will automatically restart on system reboot.
Command Breakdown
docker pull synback/lightscope:latest- Downloads the latest LightScope image-d- Runs the container in detached (background) mode--name lightscope- Names the container "lightscope" for easy management--cap-add=NET_RAW- Grants raw socket access for packet capture--cap-add=NET_ADMIN- Grants network interface management capabilities--network=host- Uses host networking for full network visibility--restart=unless-stopped- Automatically restarts unless manually stopped
Managing the Docker Container
- View logs:
docker logs lightscope - Follow logs:
docker logs -f lightscope - Check status:
docker ps | grep lightscope - Stop container:
docker stop lightscope - Start container:
docker start lightscope - Restart container:
docker restart lightscope - Remove container:
docker rm -f lightscope
Finding Your Database Name
Your unique database name is displayed in the container logs:
docker logs lightscope | grep -i databaseℹ️ Use this database name to access your dashboard at https://lightscope.isi.edu/tables
Linux Installation
LightScope is available as pre-built packages for all major Linux distributions:
Linux Downloads
Download the latest LightScope packages for Linux:
After downloading, install using the commands below or your package manager.Debian/Ubuntu (.deb) MINIMAL i.e. EC2 default
sudo apt-get update && sudo apt-get install -y software-properties-common && sudo add-apt-repository -y universe && sudo apt-get update && wget https://thelightscope.com/latest/lightscope_latest.deb && sudo apt install -y ./lightscope_latest.debℹ️ The -y automatically confirms installation. This will install all dependencies and start the LightScope service.
Debian/Ubuntu (.deb) normal, with universe repo enabled
wget https://thelightscope.com/latest/lightscope_latest.deb && sudo apt install -y ./lightscope_latest.debℹ️ The -y automatically confirms installation. This will install all dependencies and start the LightScope service.
Red Hat Enterprise Linux 10 (.rpm)
wget https://thelightscope.com/latest/lightscope_latest.rpm && sudo subscription-manager repos --enable codeready-builder-for-rhel-10-$(uname -m)-rpms && sudo dnf install -y dnf-plugins-core && sudo dnf install -y ./lightscope_latest.rpm-y automatically confirms installation. This will install all dependencies and start the LightScope service.
Red Hat Enterprise Linux 9 (.rpm)
wget https://thelightscope.com/latest/lightscope_latest.rpm && sudo subscription-manager repos --enable codeready-builder-for-rhel-9-$(uname -m)-rpms && sudo dnf install -y dnf-plugins-core && sudo dnf install -y ./lightscope_latest.rpm-y automatically confirms installation. This will install all dependencies and start the LightScope service.
Fedora Linux(.rpm)
wget https://thelightscope.com/latest/lightscope_latest.rpm && sudo dnf install -y dnf-plugins-core && sudo dnf install -y ./lightscope_latest.rpm-y automatically confirms installation. This will install all dependencies and start the LightScope service.
Alma Linux(.rpm)
wget https://thelightscope.com/latest/lightscope_latest.rpm && sudo dnf install -y dnf-plugins-core && sudo dnf config-manager --set-enabled crb && sudo dnf install -y ./lightscope_latest.rpm-y automatically confirms installation. This will install all dependencies and start the LightScope service.
Amazon AWS Linux(.rpm)
wget https://thelightscope.com/latest/lightscope_latest.rpm && sudo dnf install -y dnf-plugins-core && sudo dnf install -y ./lightscope_latest.rpm-y automatically confirms installation. This will install all dependencies and start the LightScope service.
After Installation (If Needed)
- Service Status:
sudo systemctl status lightscope - View Logs:
sudo journalctl -u lightscope -f - Restart Service:
sudo systemctl restart lightscope - Find Your Database Name & Dashboard URL:
sudo systemctl status lightscope- look for your dashboard URL in the Docs line!
✅ LightScope runs securely as a system service with minimal privileges.
systemctl status:
● lightscope.service - LightScope Network Security Monitor
Docs: https://thelightscope.com
https://thelightscope.com/light_table/20250629_gvzdkbinpryhdrszsdzufpoeejxmoyhngrrjrjrxodfsuwf
Verifying Linux Installation
To verify that LightScope is running correctly on Linux:
- Check service status:
sudo systemctl status lightscopeshould show "active (running)" - Monitor network activity: LightScope automatically captures unwanted TCP traffic on your network
- View logs: Use
sudo journalctl -u lightscope -fto see live activity - Dashboard access: Visit the Dashboard page to enter your unique database name and access your personalized threat intelligence
✅ LightScope automatically starts after installation and runs securely as a system service with minimal privileges.
How Does Linux Installation Work?
Security was our top priority when designing LightScope's installation and operation. Here's what happens during installation:
🔒 Security-First Architecture
- Dedicated System User: Creates a low-privilege system user called
lightscopewith no shell access - No Root Privileges: LightScope never runs as root - the service operates with minimal system privileges
- Linux Capabilities: Instead of root access, we grant only the specific network capabilities needed:
CAP_NET_RAW- Raw socket access for packet captureCAP_NET_ADMIN- Network interface managementCAP_NET_BIND_SERVICE- Bind to network services
- Filesystem Isolation: Protected system files, isolated temporary directories, and restricted file access
⚙️ Installation Process
- System Dependencies: Installs required libraries (libpcap-devel, python3-devel, etc.)
- User Creation: Creates the
lightscopesystem user with home directory/opt/lightscope - Directory Structure: Sets up secure directories for configuration, logs, and updates
- Python Environment: Configures Python with network capabilities (no root needed)
- Systemd Service: Installs and enables the
lightscopeservice for automatic startup - Security Hardening: Applies filesystem protections and capability restrictions
- Service Start: Automatically starts monitoring network traffic
🛡️ Runtime Security Features
- Privilege Separation: Runs as unprivileged
lightscopeuser, not root - Minimal Attack Surface: Only network inspection capabilities, no system administration rights
- Automatic Restart: Systemd monitors and restarts the service if needed
- Secure Logging: All activity logged to systemd journal with proper permissions
- Resource Limits: Built-in limits on memory, file handles, and system resources
🔄 Secure Automatic Updates
LightScope includes a secure automatic update system designed with security as the top priority:
- Hourly Update Checks: Automatically checks for new versions every hour from
https://thelightscope.com - Cryptographic Signatures: All updates are signed with RSA-4096 cryptographic signatures before distribution
- Signature Verification: Every update is cryptographically verified before installation - unsigned updates are rejected
- HTTPS-Only Downloads: All update downloads use encrypted HTTPS connections to prevent tampering
- Public Key Pinning: The public verification key is stored locally and validated to prevent key substitution attacks
- Backup System: Previous versions are automatically backed up before applying updates
- Rollback Protection: If an update fails verification or causes issues, the system can rollback to the previous version
- Update Logs: All update activity is logged to the systemd journal for audit purposes
lightscope user and cannot modify system files outside of /opt/lightscope.
🛑 Stopping and Uninstalling LightScope
To stop LightScope temporarily:
sudo systemctl stop lightscopeTo disable auto-start (but keep installed):
sudo systemctl disable lightscopeTo completely uninstall LightScope:
sudo systemctl stop lightscope
sudo apt remove lightscope
sudo apt purge lightscope # Removes config files toosudo systemctl stop lightscope
sudo yum remove lightscope
# or: sudo dnf remove lightscopeManual cleanup (if needed):
# Remove user and home directory
sudo userdel -r lightscope

# Clean up any remaining files
sudo rm -rf /opt/lightscope
ℹ️ The package manager handles cleanup automatically, but manual commands are provided for reference.
🔧 Linux Troubleshooting
- Service not starting: Check service status with
sudo systemctl status lightscope - Permission issues: The package automatically configures proper permissions and capabilities
- Package conflicts: If installation fails, try
sudo apt update(Debian/Ubuntu) orsudo yum update(RHEL/CentOS) - Network issues: Ensure your firewall allows the LightScope service to monitor network traffic
- View detailed logs: Use
sudo journalctl -u lightscope -fto see real-time service logs
Windows Installation
LightScope is available as a Windows installer that automatically configures all dependencies:
Windows Download
Download the latest LightScope installer for Windows:
Compatible with Windows 10 and Windows 11. Follow the installation steps below.Prerequisites
Before running the LightScope installer, please ensure you have:
- Python 3.8+: Download from python.org
- ⚠️ Important: During Python installation, make sure to check the "Add Python to PATH" option
- This allows LightScope to find Python automatically
- Npcap: Download from nmap.org/npcap
- Required for network packet capture on Windows
- Install with default settings
Installation Steps
- Download: Get the Windows installer from the Direct Downloads section above
- Run Installer: Double-click
lightscope_latest.exeto launch the installer - Follow Wizard: The installer will guide you through the setup process
- Automatic Start: LightScope will automatically start running in the background
- Firewall Permission: Allow LightScope through Windows Firewall when prompted
✅ LightScope automatically starts with Windows and runs in the background.
Windows Capabilities
- No Administrator Permissions Required: LightScope runs as a standard user application
- No Special Permissions: No special system permissions need to be granted
- Firewall Access Only: The only permission required is allowing through Windows Firewall (happens automatically during installation)
- User-Level Operation: Runs safely in user space without system-level access
Using LightScope on Windows
- Automatic Startup: LightScope runs automatically when Windows starts
- System Tray: Look for the LightScope icon in your system tray (bottom-right corner)
- Access Dashboard: Right-click the LightScope icon and select "View Dashboard" to open your personalized dashboard
- Status Monitoring: The tray icon indicates LightScope is running and monitoring your network
- Quit LightScope: Right-click the tray icon and select "Quit" to stop LightScope
- LightScope will be installed at "C:\Users\Eric\AppData\Local\LightScope" where you replace "Eric" with your username. You can view logs etc at this location.
Visual Guide:
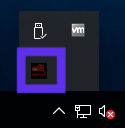
Step 1: Look for the LightScope icon in your system tray
Step 2: Right-click to access dashboard or quit LightScope
Uninstalling LightScope on Windows
- Open Settings: Go to Windows Settings > Apps > Apps & features
- Find LightScope: Search for "LightScope" in the app list
- Uninstall: Click on LightScope and select "Uninstall"
- Complete Removal: LightScope will be completely removed from your system
ℹ️ Alternative: Go to Control Panel > Programs and Features > Uninstall a program, then select LightScope.
macOS Installation
LightScope is available as a native macOS package that integrates seamlessly with your Mac:
macOS Download
Download the latest LightScope package for macOS:
Compatible with macOS 10.14 (Mojave) and later. Includes installation script.Quick Terminal Installation
For advanced users, here's the complete installation in terminal commands:
# Download and extract

curl -LO https://thelightscope.com/latest/lightscope_latest_macos.zip
 unzip lightscope_latest_macos.zip
 cd lightscope/

 # Install LightScope
./install.sh

# If that doesn't work, try: sh install.sh or email me at e@alumni.usc.edu for support.
# After 10 seconds you will get a pop up informing you that LightScope is running.
# You can view your dashboard by clicking the LightScope icon in the top right corner of your screen.
Managing LightScope Service
Check if LightScope is running:
launchctl list | grep lightscope✅ You should see: com.thelightscope.lightscope if LightScope is running
View LightScope processes:
ps aux | grep lightscope-runner✅ You should see "lightscope-runner.py" processes under your username
_lightscope processes in ps aux | grep lightscope - these are unrelated macOS system processes. Look specifically for lightscope-runner.py processes under your username.
Stop LightScope:
launchctl unload ~/Library/LaunchAgents/com.thelightscope.lightscope.plist✅ After stopping, ps aux | grep lightscope-runner should show no processes under your username
Start LightScope:
launchctl load ~/Library/LaunchAgents/com.thelightscope.lightscope.plist✅ After starting, ps aux | grep lightscope-runner should show the lightscope-runner.py process
Restart LightScope:
launchctl unload ~/Library/LaunchAgents/com.thelightscope.lightscope.plist
 launchctl load ~/Library/LaunchAgents/com.thelightscope.lightscope.plist
✅ LightScope automatically restarts if it crashes or encounters errors.
_lightscope processes you may see in ps aux | grep lightscope are unrelated macOS system processes. Only look for lightscope-runner.py processes under your username to verify LightScope status.
Finding Your Database Name
Your unique database name is available in several places. Choose the method that works best for you:
🚀 Quick Method (Recommended):
grep '^database = ' /Applications/LightScope.app/Contents/Resources/config.ini | cut -d'=' -f2 | tr -d ' 'or Configuration File:
cat /Applications/LightScope.app/Contents/Resources/config.iniLook for the line starting with database =
[Settings]
database = 20250715_eawucbwzjsuryhdyqviwprftseknpgsavjiwxpxvujbmdsuvbmhxak
https://thelightscope.com/light_table/YOUR_DATABASE_NAME📋 Web Interface: You can also visit https://thelightscope.com/light_table/ to enter your database name manually.
Viewing Logs
LightScope logs are stored in:
/Applications/LightScope.app/Contents/Resources/logs/View recent activity:
tail -f /Applications/LightScope.app/Contents/Resources/logs/lightscope.logView all logs:
ls -la /Applications/LightScope.app/Contents/Resources/logs/Search logs for your database name:
grep "database" /Applications/LightScope.app/Contents/Resources/logs/*.logℹ️ Logs include startup messages, network activity, and any errors or warnings.
Verifying macOS Installation
To verify that LightScope is running correctly on macOS:
- Check LaunchAgent:
launchctl list | grep lightscopeshould show the service - Check processes:
ps aux | grep lightscope-runnershould show running processes under your username - Check notifications: You should receive periodic LightScope status notifications
- Check logs:
tail /Applications/LightScope.app/Contents/Resources/logs/lightscope.logshould show recent activity - Dashboard access: Visit the Dashboard page to enter your database name
yourusername 1234 0.0 0.0 411683648 55856 ?? S 10:45AM 0:03.25 Python /Applications/LightScope.app/Contents/Resources/bin/lightscope-runner.pyHow Does macOS Installation Work?
LightScope for macOS is designed to integrate seamlessly with macOS security and user experience:
🔒 Security-First Design
- Application Bundle: Installed as a standard (not root!) macOS application in
/Applications/LightScope.app - No elevated permissions to run
- Minimal Privileges: Runs with only the network monitoring privileges required
- Sandboxed Operation: Operates within macOS security constraints
- No System Extensions: No kernel extensions or system modifications required
⚙️ Installation Process
- Application Installation: Installs LightScope.app to
/Applications/ - LaunchAgent Setup: Configures automatic startup via LaunchAgent
- Configuration Generation: Creates unique database name and configuration
- Log Directory: Sets up logging in application bundle
- Notification Registration: Registers for macOS notification system
- Service Start: Automatically starts monitoring network traffic
🛡️ Runtime Security Features
- User-Level Operation: Runs as the logged-in user, not as root
- LaunchAgent Management: macOS automatically manages the service lifecycle
- Crash Recovery: Automatically restarts if the service encounters issues
- Native Notifications: Integrates with macOS notification system
- Resource Management: macOS handles resource limits and cleanup
🔄 Automatic Updates
LightScope includes secure automatic updates:
- Hourly Update Checks: Checks for new versions every hour
- Cryptographic Verification: All updates are cryptographically signed and verified
- HTTPS Downloads: All updates downloaded over secure HTTPS connections
- Backup and Rollback: Previous versions backed up before updates
- User Notification: Notifies you when updates are applied
Uninstalling LightScope
Method 1: Using the included uninstall script (Recommended)
# Navigate to your original LightScope package directory
cd /path/to/lightscope_package/

# Run the uninstall script
sudo ./uninstall.sh
Method 2: Manual removal
To completely uninstall LightScope from macOS manually:
1. Stop the service:
launchctl unload ~/Library/LaunchAgents/com.thelightscope.lightscope.plist2. Remove the LaunchAgent:
rm ~/Library/LaunchAgents/com.thelightscope.lightscope.plist3. Remove the application:
rm -rf /Applications/LightScope.appAlternative: Use Finder
- Open Finder and go to Applications
- Find LightScope.app
- Drag it to the Trash
- Empty the Trash
ℹ️ The LaunchAgent will need to be removed manually if using Finder method.
macOS Troubleshooting
- Service not starting: Check
launchctl list | grep lightscopeand restart if needed - No notifications: Check System Preferences > Notifications > LightScope to ensure notifications are enabled
- Permission issues: The installer automatically configures required permissions
- Network issues: LightScope requires network access - check macOS firewall settings
- View detailed logs: Check
/Applications/LightScope.app/Contents/Resources/logs/lightscope.logfor detailed information - Multiple interfaces: LightScope automatically monitors all active network interfaces
Need Help?
If you encounter any issues during installation or have questions about LightScope, we're here to help!
Contact Support
Email: e@alumni.usc.edu
Response Time: We typically respond within 24 hours